Remote rendering using VNC and ParaView
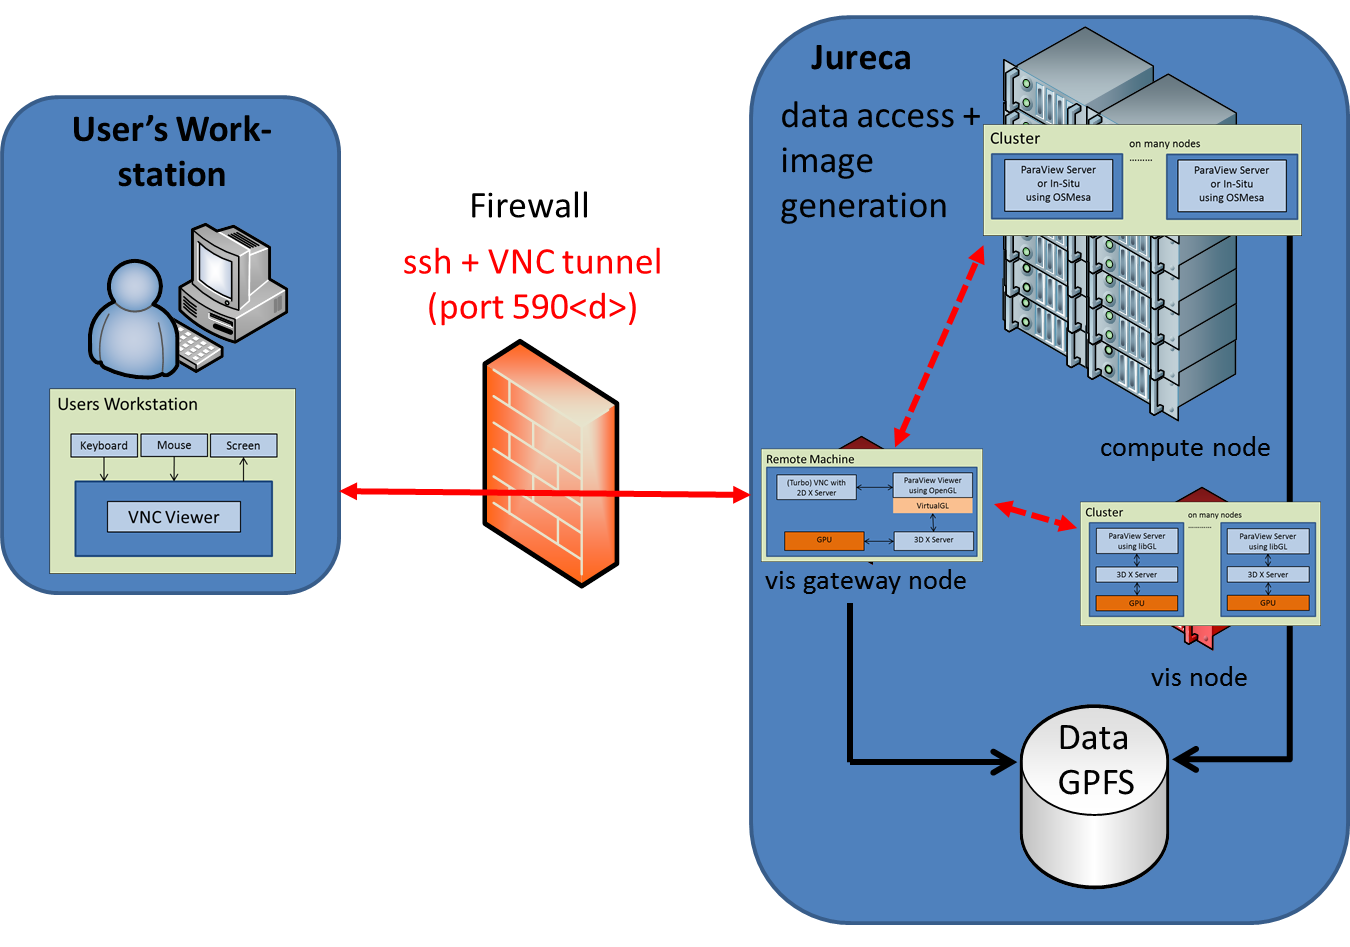
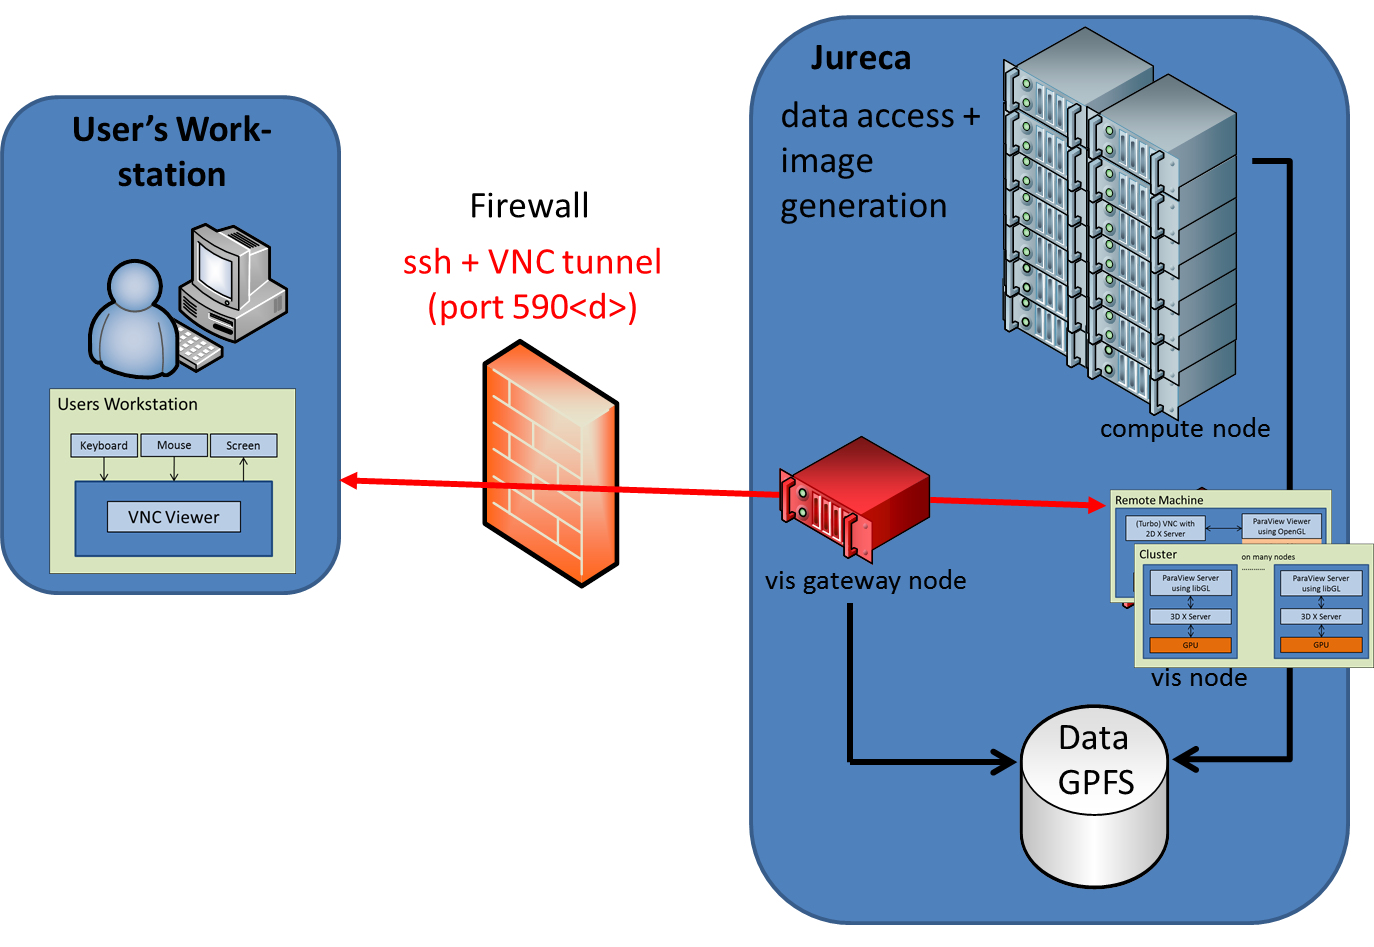
Remote rendering is also possible using the Virtual Network Computing (VNC, e.g. TigerVNC or TurboVNC) package. We advice you to use the strudel application to access an interactive desktop session on JURECA. See section vnc3d for a detailed description of a VNC session on JURECA.
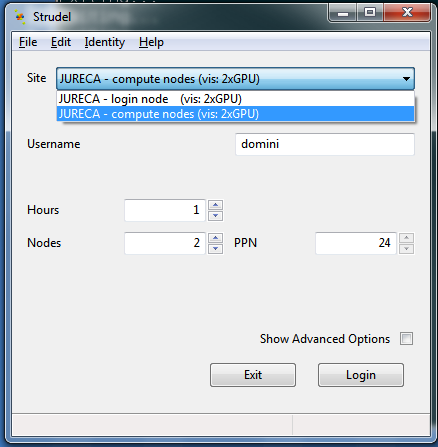
Strudel provides you with the options
- to login to JURECA - login node (vis:2xGPU) to run the vnc-server on a visualization login node, or
- to JURECA - compute nodes (vis 2xGPU) to run the vnc-server on JURECA's visualization batch nodes:

| connect to | pro | contra | |
|
|
|
|
|
|
|


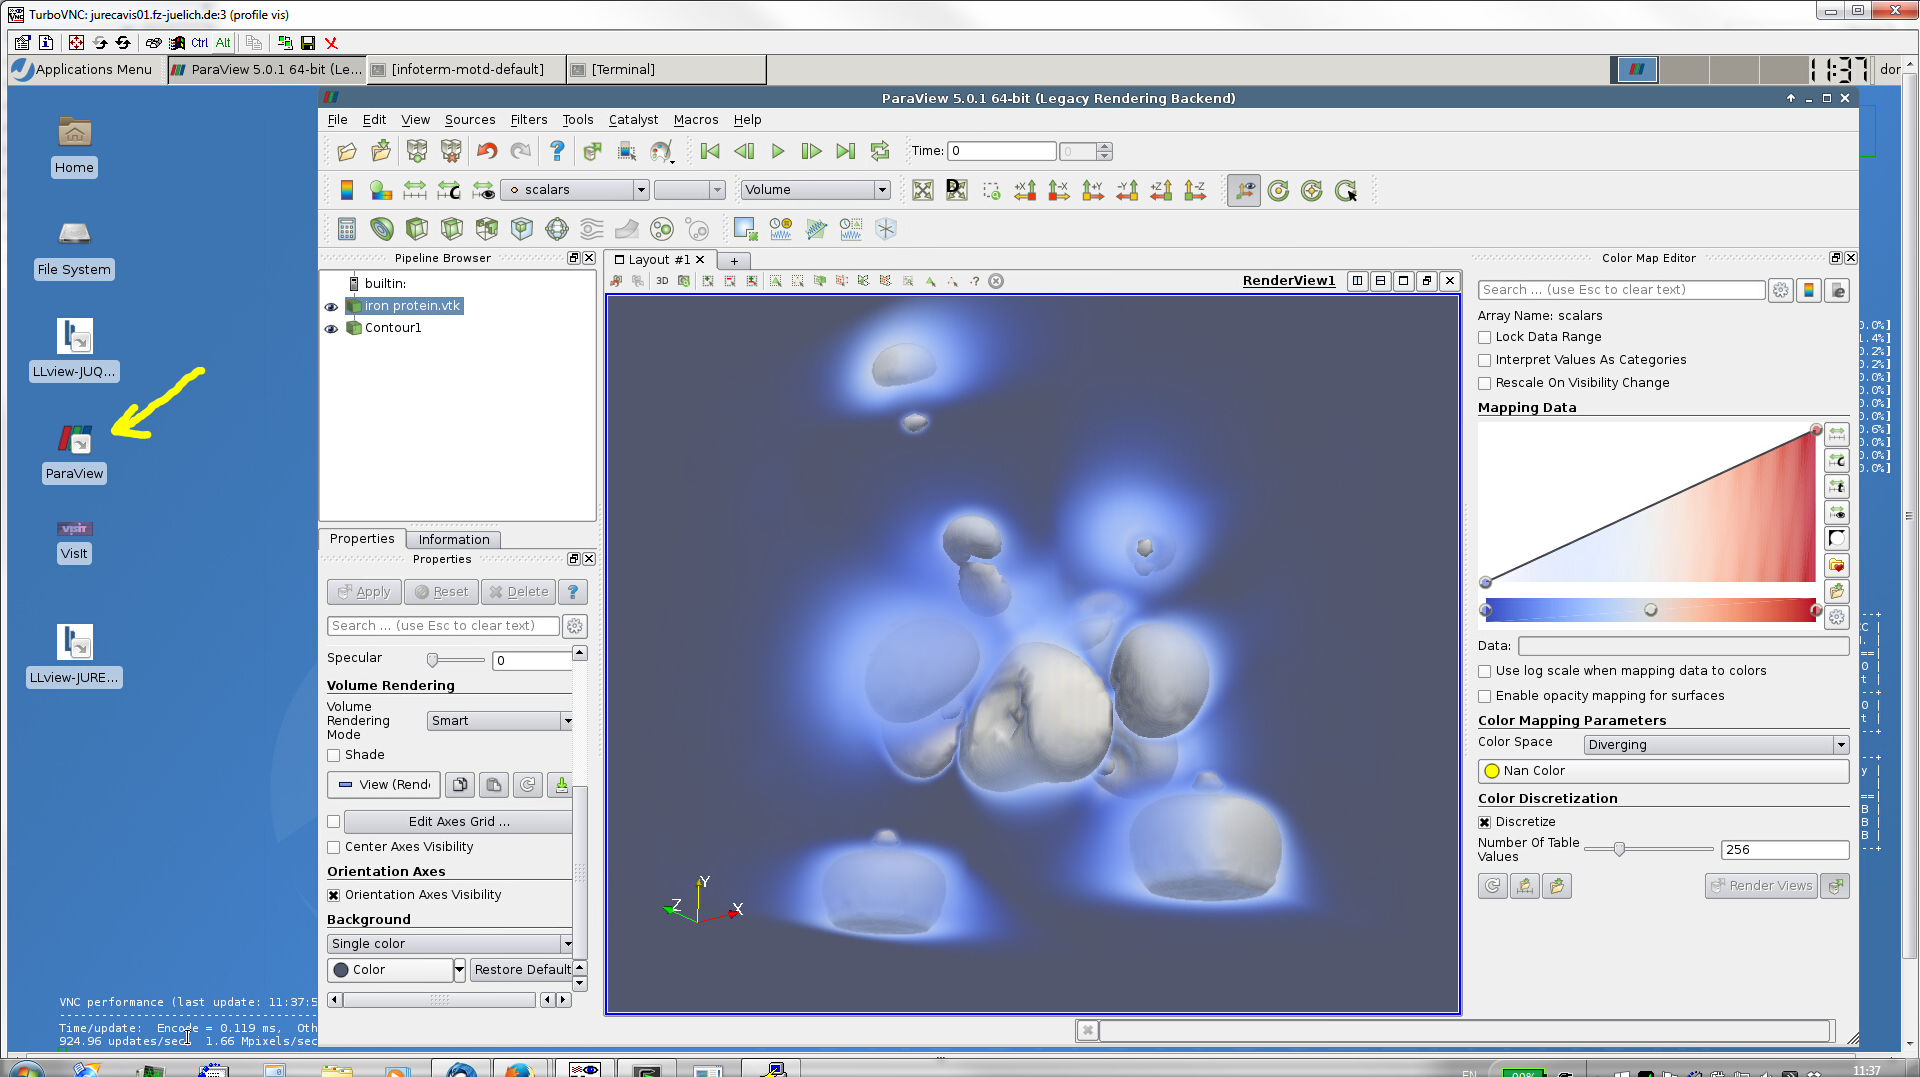
Starting the ParaView GUI on the remote desktop
In case you startet the VNC server with the option '-profile vis', your VNCViewer should look like this:

Now, just double-click on the ParaView-Icon to start the ParaView client.
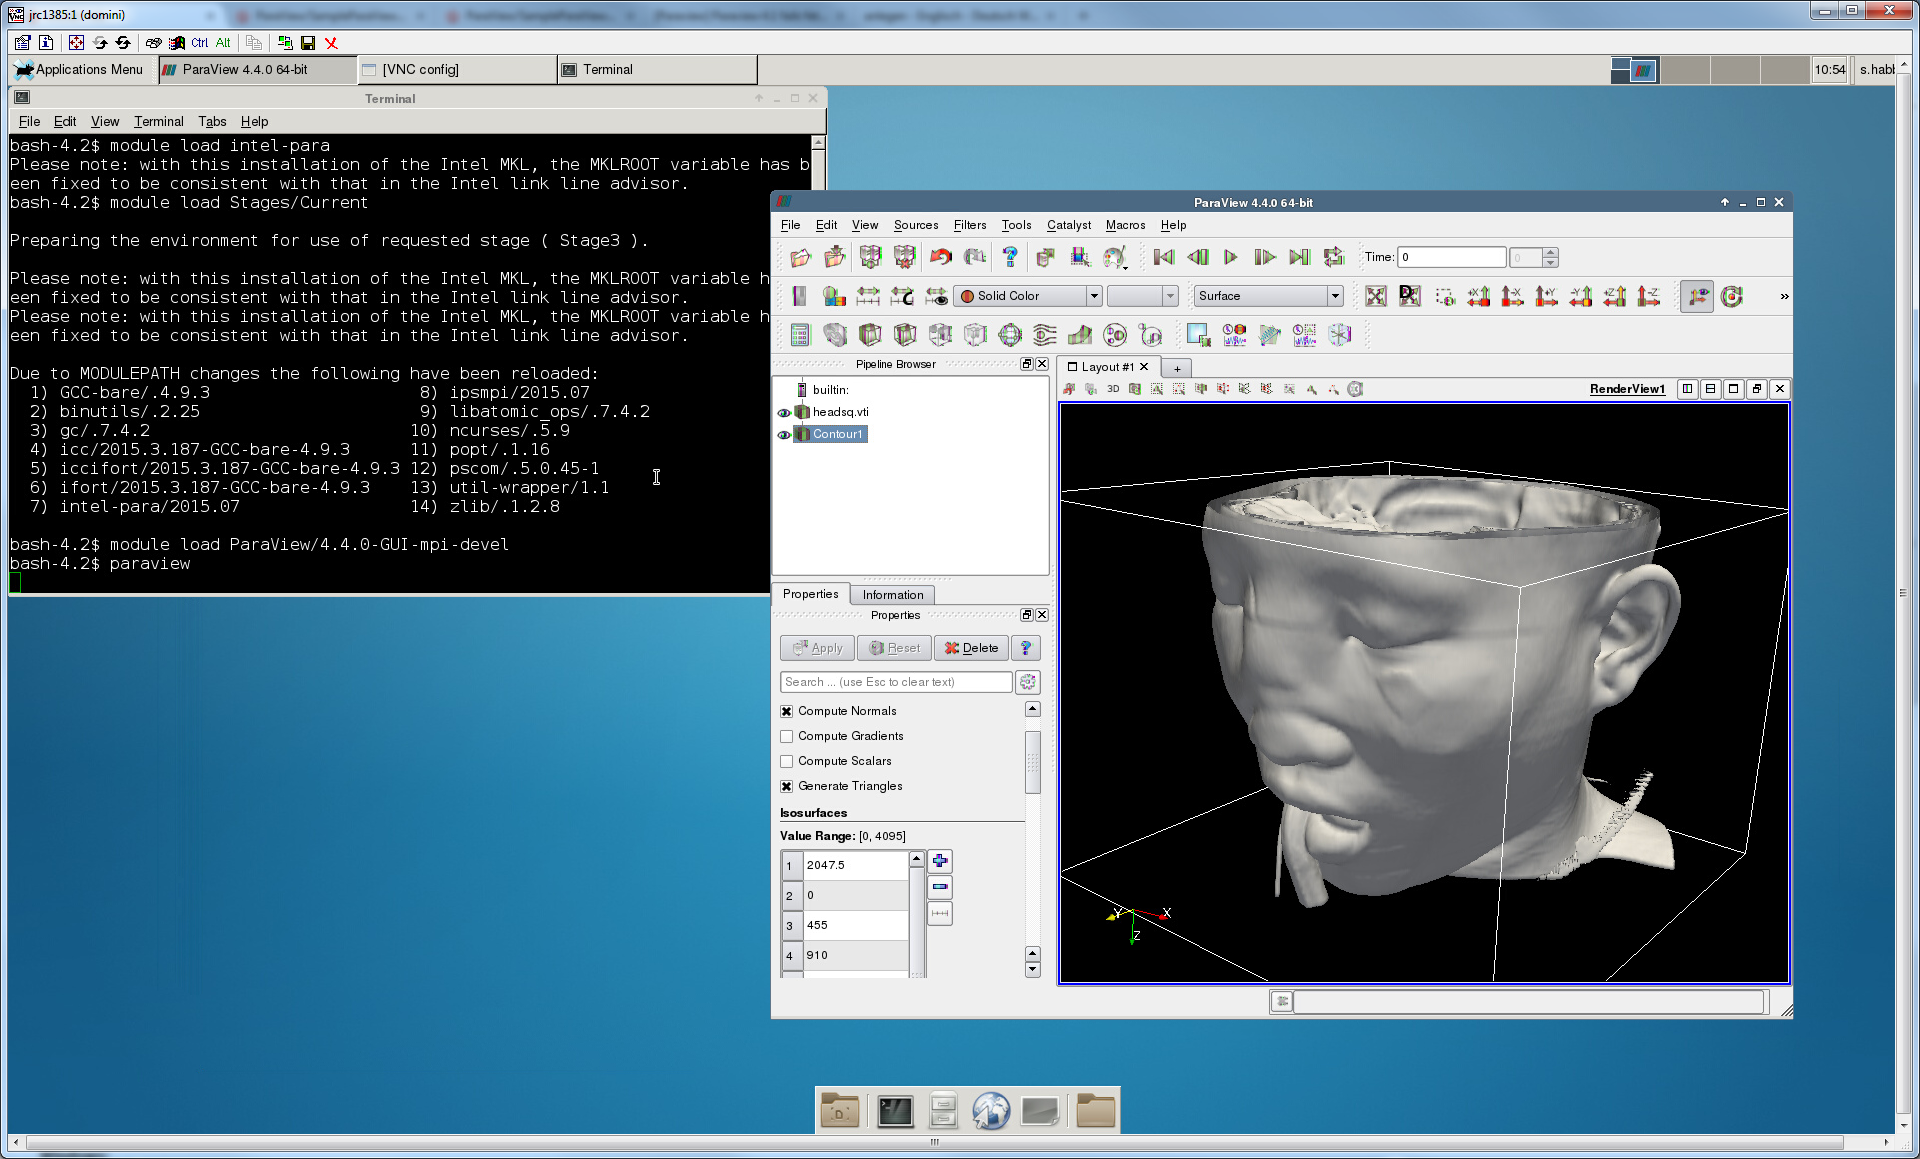
Starting a pvserver on JURECA's compute nodes
In this section we show how to use ParaView's server side rendering capabilities on JURECA's compute nodes in a sample session step by step.
- Open a terminal and load the modules providing the ParaView software
bash-4.2$ module load Stages/Current intel-para ParaView/5.0.1-OSMesa
- Next, we allocate some resources for our ParaView server, and run the ParaView server (in this example session on 1 node, using 24 tasks)
bash-4.2$ salloc --partition=devel --nodes=1 --time=00:20:00
salloc: Pending job allocation 1711109
salloc: job 1711109 queued and waiting for resources
salloc: job 1711109 has been allocated resources
salloc: Granted job allocation 1711109
bash-4.2$ srun --nodes=1 --ntasks=24 pvserver
which will produce the following output from the ParaView server:
Waiting for client...
Connection URL: cs://jrc0036:11111
Accepting connection(s): jrc0036:11111
where
jrc0036:11111is the hostname and portnumber on JURECA the server will listen to.
- As a next step, click the Connect button in the ParaView GUI and configure a server with the corresponding hostname and portnumber as described here
Starting a pvserver on JURECA's visualization nodes
In this section we show how to use ParaView's server side rendering capabilities on JURECA's visualization nodes in a sample session step by step.
- open a terminal and load the modules providing the ParaView software
bash-4.2$ module load Stages/Current intel-para ParaView
and set the DISPLAY environment variable as follows
bash-4.2$ export DISPLAY=:0.0
- Next, we allocate some resources for our ParaView server (this step has to be omitted in case you started a VNC session on the visualization batch nodes via strudel, since strudel allready allocated some resources for you)
bash-4.2$ salloc -N 2 -p vis --gres gpu:2 --start-xserver
and run the ParaView server (in this example session on 2 nodes, using 48 tasks):bash-4.2$ srun --cpu_bind=none --ntasks=48 --gres=gpu:0 vglrun pvserver --use-offscreen-rendering
which will produce the following output from the ParaView server:
Waiting for client...
Connection URL: cs://jrc1391:11111
Accepting connection(s): jrc1391:11111
where
jrc1391:11111is the hostname and portnumber on JURECA the server will listen to.
Attachments (5)
- PVClientWithVNC.PNG (1.1 MB ) - added by 8 years ago.
- VNCViewer.PNG (1.2 MB ) - added by 8 years ago.
- StrudelSiteAuswahl.png (32.3 KB ) - added by 8 years ago.
- VNCOnVisLoginNode.png (198.0 KB ) - added by 8 years ago.
- VNCOnVisComputeNode.png (223.3 KB ) - added by 8 years ago.