| Remote Visualization | pro | contra | |
|---|---|---|---|
|
|
|
|
|
|
|
|


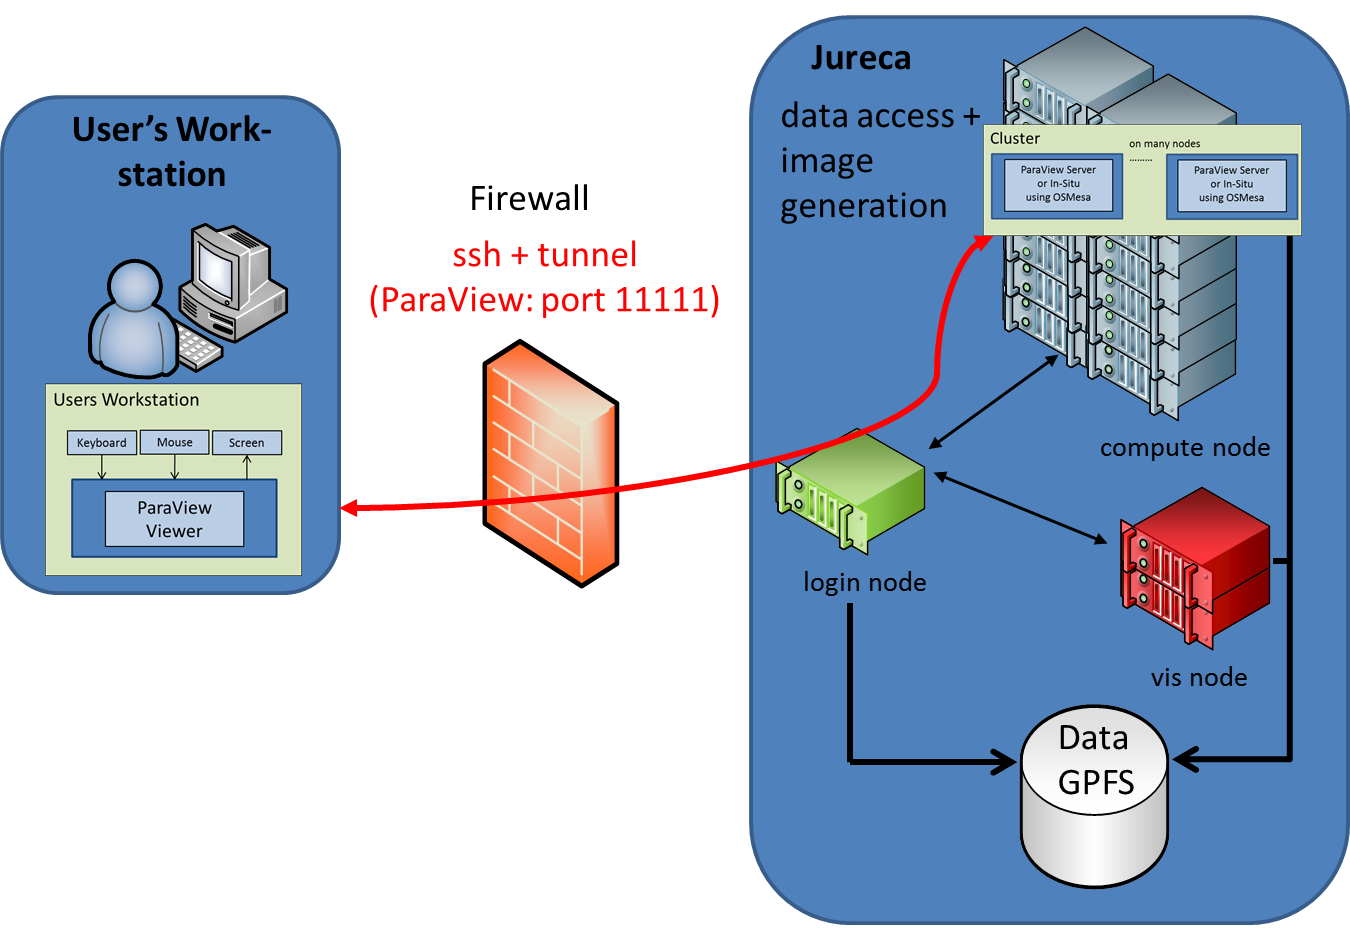
Sample ParaView session on visualization node(s)
Remote Rendering
In this section we show how to use ParaView's server side rendering capabilities on JURECA's visualization nodes in a sample session step by step.
- Login to JURECA and load the modules for ParaView
Once the account on JURECA is created, we may connect to one of the login nodes of JURECA with 'ssh user@…'. After successful login we will see the following prompt:
bash-4.2$
Now, we have to load the modules providing the ParaView software
bash-4.2$ module load Stages/Current intel-para ParaView
and set the DISPLAY environment variable as follows
bash-4.2$ export DISPLAY=:0.0
Next, we allocate some resources for our ParaView server, and run the ParaView server (in this example session on 2 nodes, using 48 tasks)
bash-4.2$ salloc -N 2 -p vis --gres gpu:2 --start-xserver
bash-4.2$ srun --cpu_bind=none --ntasks=48 --gres=gpu:0 vglrun pvserver --use-offscreen-rendering
which will produce the following output from the ParaView server:
Waiting for client...
Connection URL: cs://jrc1391:11111
Accepting connection(s): jrc1391:11111
where
jrc1391:11111
is the hostname and portnumber on JURECA the server will listen to.
- As a next step, we establish a tunnel connection to the above mentioned port:
ssh -L 11111:jrc1391:11111 jureca
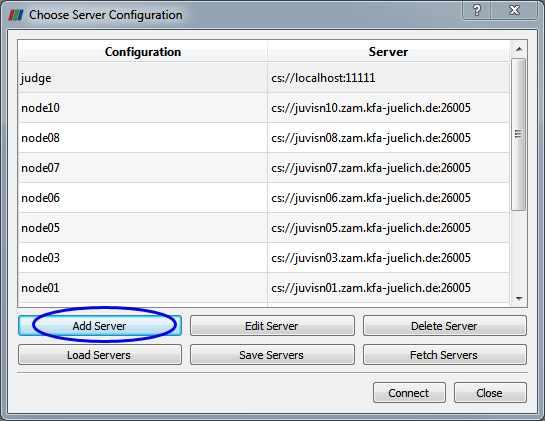
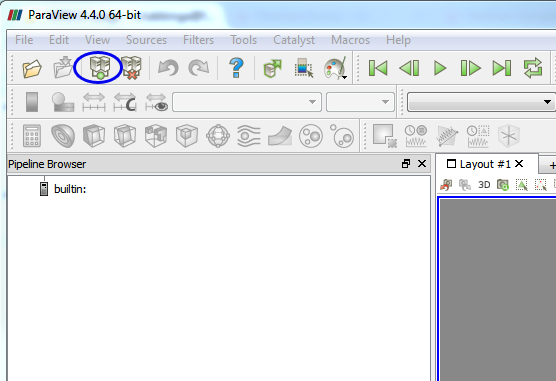
- Now, we can open the GUI on our workstation and connect to the pvserver running on JURECA:

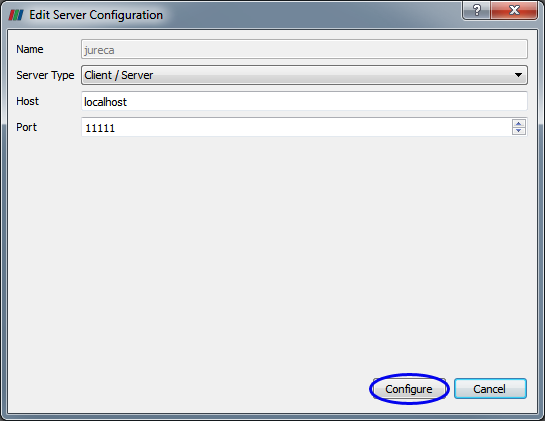
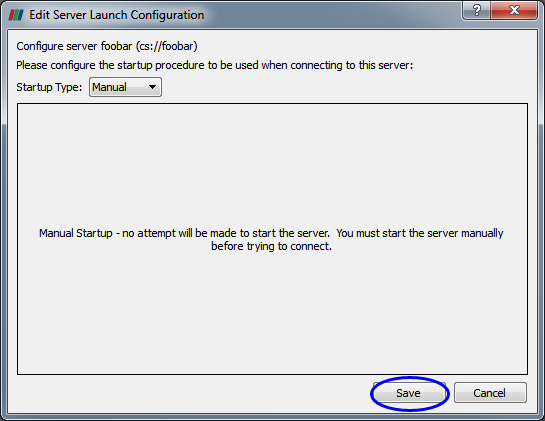
In the dialog that will now pop up, press "Add Server" and setup the server as follows:


Note that this has to be done only once, since ParaView remembers the generated server configurations.
Then, make sure your newly created server is selected and click the Connect button in the Choose Server Configuration dialog.

- Finally, we can open the Open File Dialog and select some data from JURECA's filesystem.

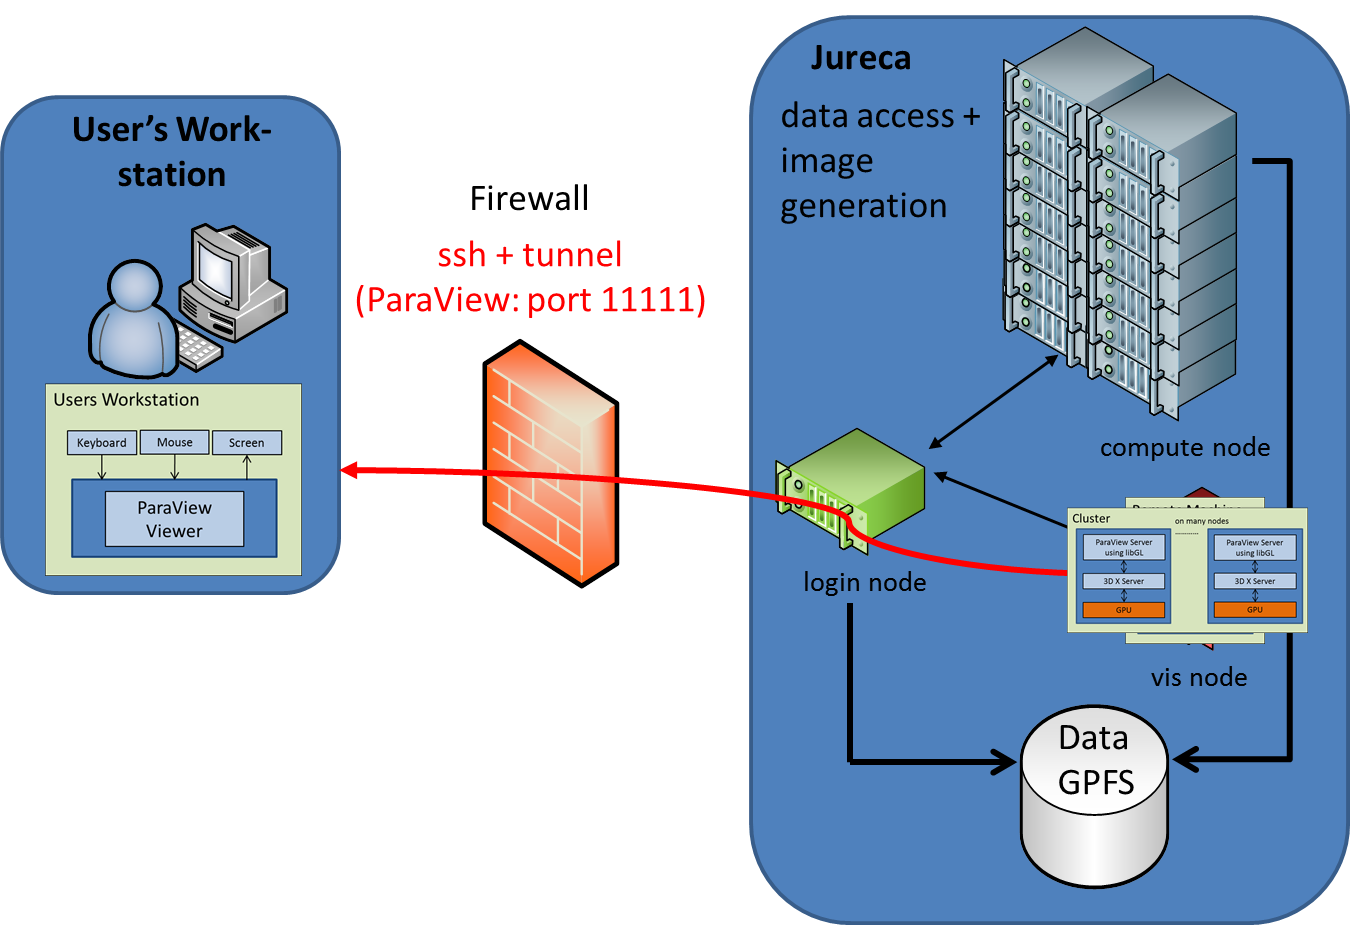
Sample ParaView session on compute node(s)
Remote Rendering
In this section we show how to use ParaView's server side rendering capabilities on JURECA's compute nodes in a sample session step by step.
- Login to JURECA and load the modules for ParaView
Once the account on JURECA is created, we may connect to one of the login nodes of JURECA with 'ssh user@…'. After successful login we will see the following prompt:
bash-4.2$
Now, we have to load the modules providing the ParaView software
bash-4.2$ module load Stages/Current intel-para ParaView/5.0.1-OSMesa
Next, we allocate some resources for our ParaView server, and run the ParaView server (in this example session on 1 node, using 24 tasks)
bash-4.2$ salloc --partition=devel --nodes=1 --time=00:20:00
salloc: Pending job allocation 1711109
salloc: job 1711109 queued and waiting for resources
salloc: job 1711109 has been allocated resources
salloc: Granted job allocation 1711109
bash-4.2$ srun --nodes=1 --ntasks=24 pvserver
which will produce the following output from the ParaView server:
Waiting for client...
Connection URL: cs://jrc0036:11111
Accepting connection(s): jrc0036:11111
where
jrc0036:11111
is the hostname and portnumber on JURECA the server will listen to.
- As a next step, we establish a tunnel connection in a new terminal on our workstation to the above mentioned port:
ssh -L 11111:jrc0036:11111 jureca
- Now, we can open the GUI on our workstation and connect to the pvserver running on JURECA as described here
Attachments (8)
- PVAddServer.PNG (26.9 KB ) - added by 8 years ago.
- PVChooseServerConfig.PNG (30.6 KB ) - added by 8 years ago.
- PVChooseServerJURECA.PNG (33.7 KB ) - added by 8 years ago.
- PVClient.PNG (473.1 KB ) - added by 8 years ago.
- PVServerLaunchConfiguration.PNG (28.8 KB ) - added by 8 years ago.
- PVClientConnectButton.PNG (49.8 KB ) - added by 8 years ago.
- PVServerOnComputeNode.png (205.5 KB ) - added by 8 years ago.
- PVServerOnVisNode.png (215.4 KB ) - added by 8 years ago.
Download all attachments as: .zip